Hello and welcome to our weekly series, Tutorial Tuesday, where each and every week we walk you through the use of an online tool, strategy, or tactic.
This week I’ll be showing you how to create a free survey using nothing more than Google Docs.
Why Google Docs?
Because it's:
- Free
- Easy
- Flexible
- Instantaneous
- Easy to share.
What more reason could you need?
Let’s do it.
Step One: Navigate to your Google Drive
In order to create a Google Doc you’ll need to access your Google Drive. The only requisite to having a Google Drive is having a Google account.
Your Google account will allow you to use:
- Google Drive
- Gmail
- YouTube
- Google Maps
- Google Play
- Google+
Odds are you already have an account. If you do not, now’s the time.
Simply head to Google Drive and login (or create a new account):
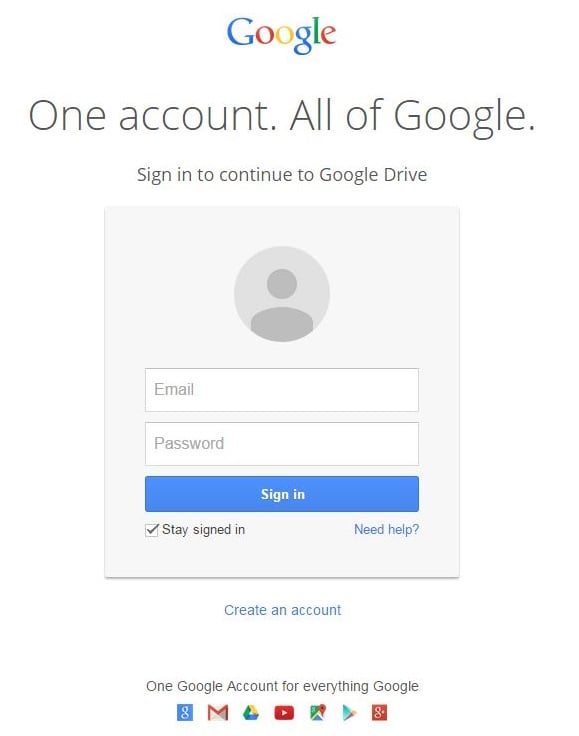
Once you sign in you’ll have access to your Google Docs, including those shared with you.
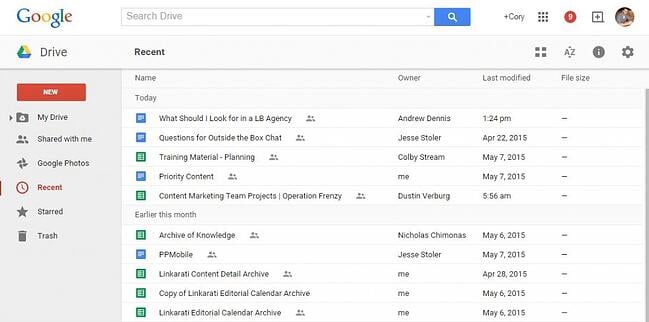
We’ll need to create a new Google Form in order to build our survey.
Step Two: Create a Google Form
Click on the top left red button that reads “NEW” – this will allow you create a new Doc, Sheet, Slide, Folder, etc.
Hover down to “More” and select “Google Form”.
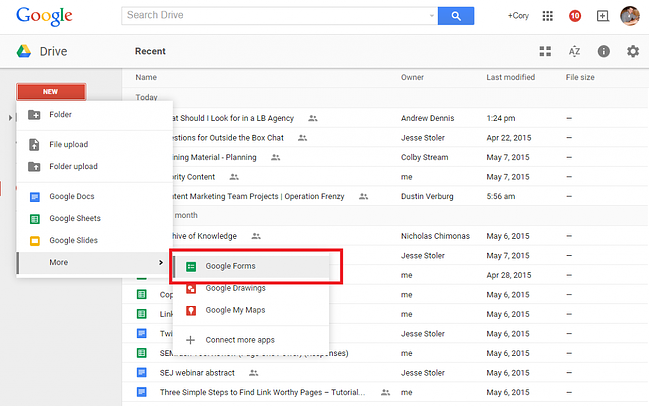
This will take create a new Google Form and take you into the form editor.
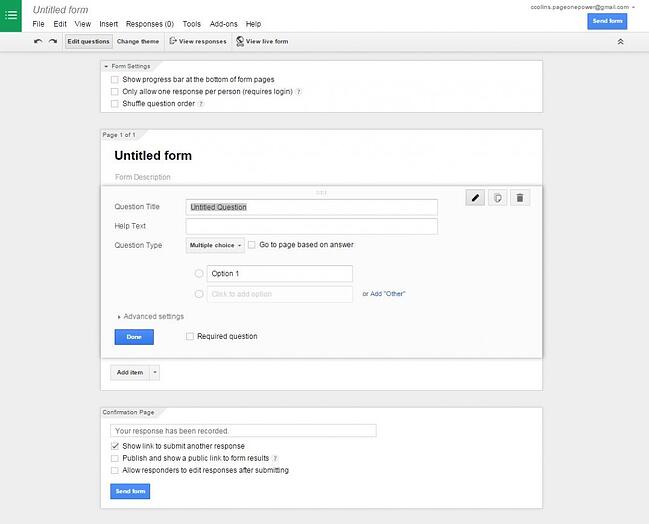
Step Three: Examining the Customization Options
Now, the fun part: making our survey.
Let’s take a moment and look at our customization options. Within the Form you can change the:
- Title
- Design
- Description
- Questions
- Question format
Furthermore there are more advanced options, which will allow you to customize how the respondents interact with the survey. You can alter the:
- Order of the questions
- Number of responses per person
- Whether a question is required
- The ability of respondents to edit their answer
Interested in adding SEO to your marketing strategy? Download our checklist to learn how to integrate SEO into your larger marketing plan!
Let’s take it a step at a time.
Step Four: Changing the title
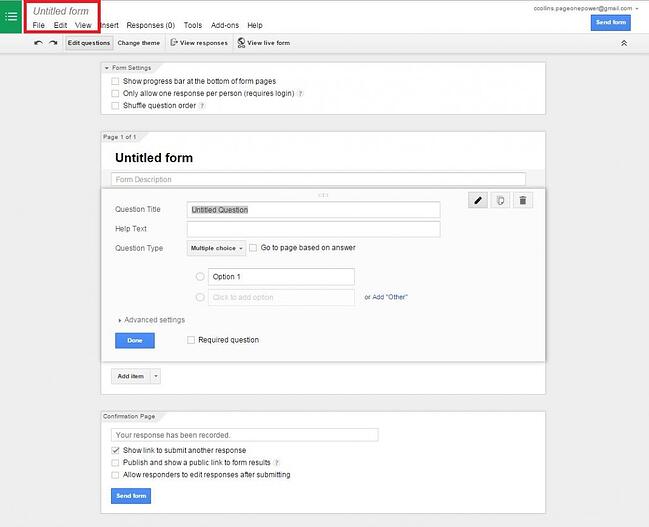
First, let’s title the Form for organizational purposes. Click the name “Untitled form” in the top left corner.
This will pop up a box to rename the form:
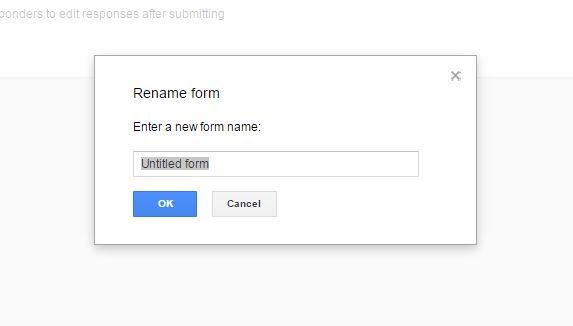
Name it appropriately. For our purposes here, we’ll name it “Example Survey”.
Step Five: Changing the Design
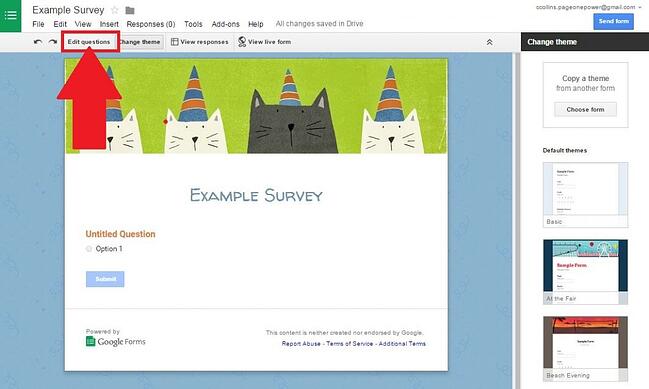
Click the “Change theme” box under the top menu. This will allow you to see the current design of your form, and pick from others in the right hand side:
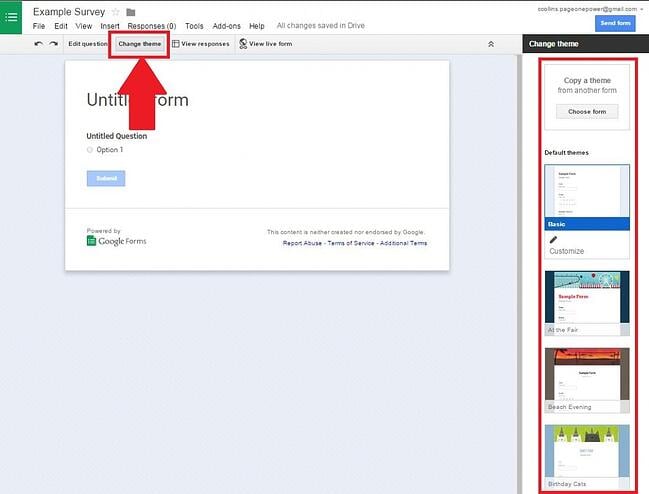
Simply choose the one you like the most. For this example let’s do “Birthday Cats” since this is after all the internet.
Once you’ve selected your theme simply click the “Edit questions” button to be taken back into the editor:
Step Six: Adding a Description
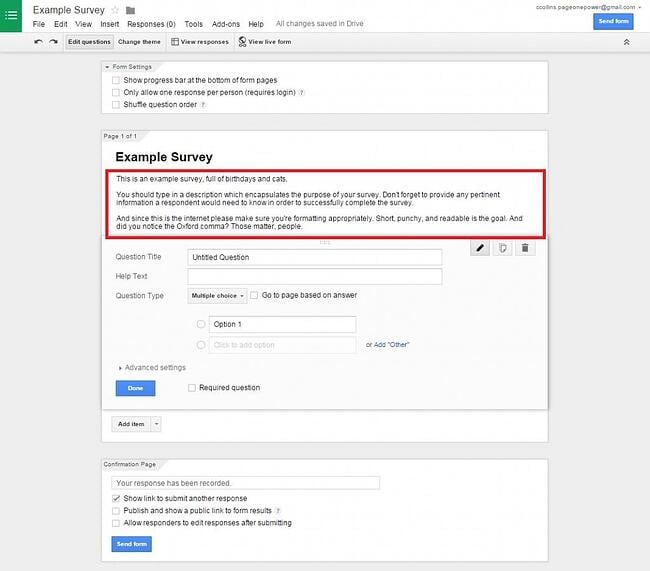
We want our survey respondents to be able to understand the survey simply by interacting with the survey. Therefore, we need a comprehensive and easy to understand description explaining the purpose of our survey.
Since we’re doing an example with the birthday cat theme, we’ll make a suitable description.
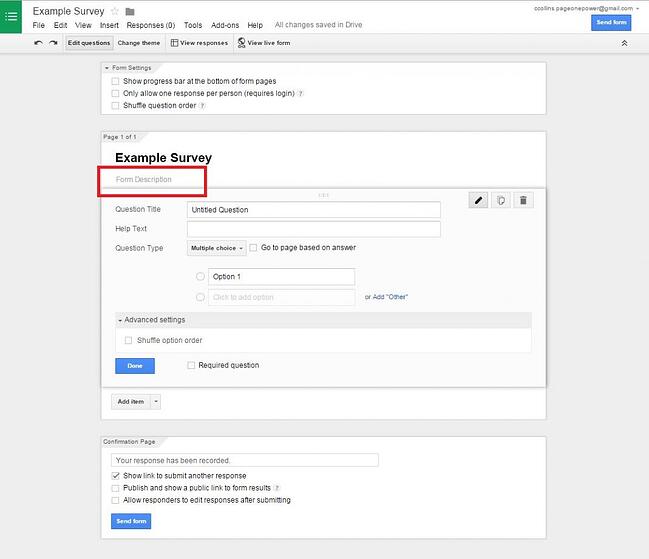
Click underneath the title in the gray text “Form Description” in order to alter the description:
Then simply type in the description of your survey.
Step Seven: Editing Questions
Now we’ve got a title, description, and design we like. Let’s build the actual survey.
The first step is to decide what type of questions we want. There are nine different options:
- Text
- Paragraph text
- Multiple choice
- Checkboxes
- Choose from a list
- Scale
- Grid
- Date
- Time
All types should be fairly self-explanatory, and I recommend if you’re confused you click around and try out different formats.
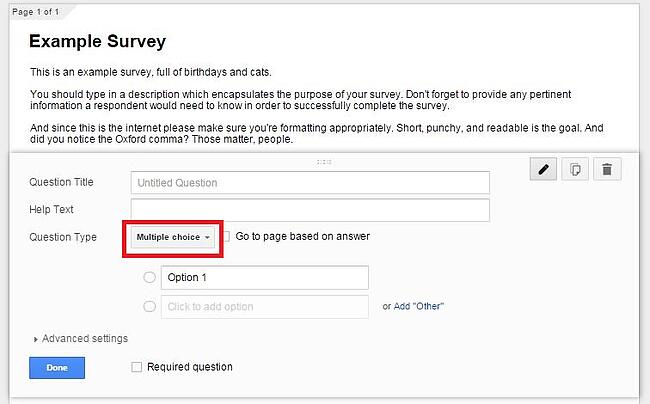
By default the first question in your survey will be multiple choice. Let’s switch that up and do a grid style question.
First, click the “Multiple choice” box and choose instead “Grid”
Fill out the relevant information:
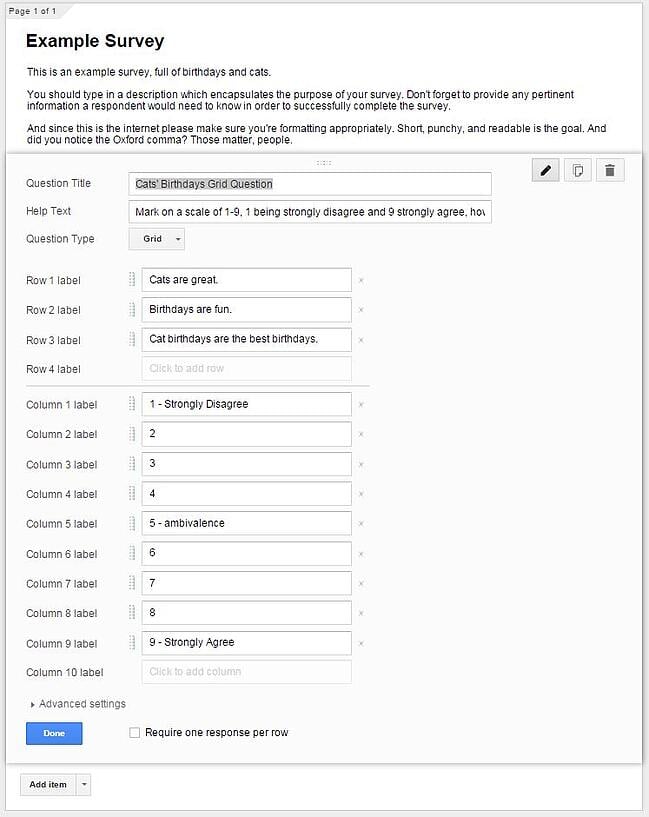
Rows will be the question, columns the level of agreement (typically). Now let’s preview what the survey will look like to a respondent.
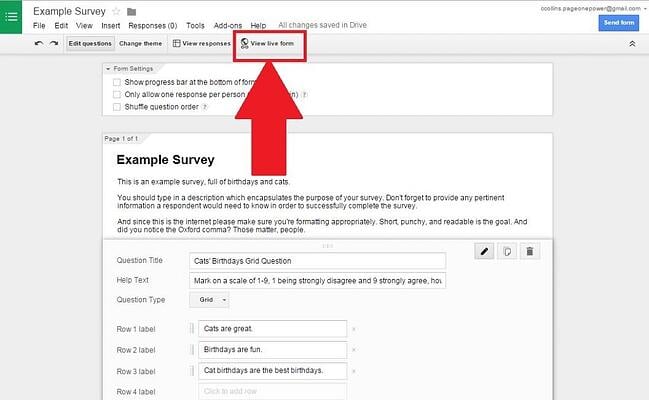
Click “View live form” in the menu:
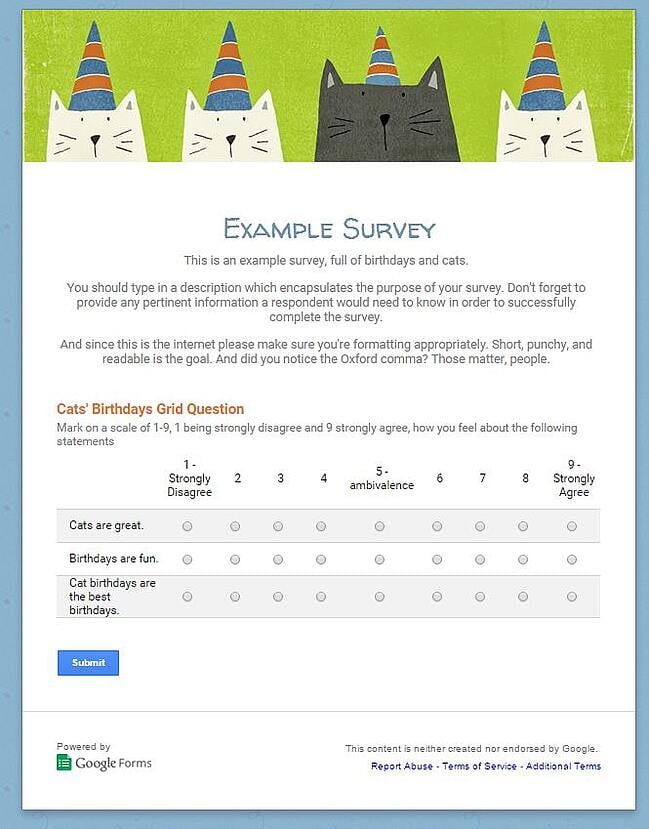
And you’ll see what your survey will look like to anyone participating in the survey:
Step Eight: Adding More Questions
Now let’s add another question.
Click the “Add item” box underneath your last question:
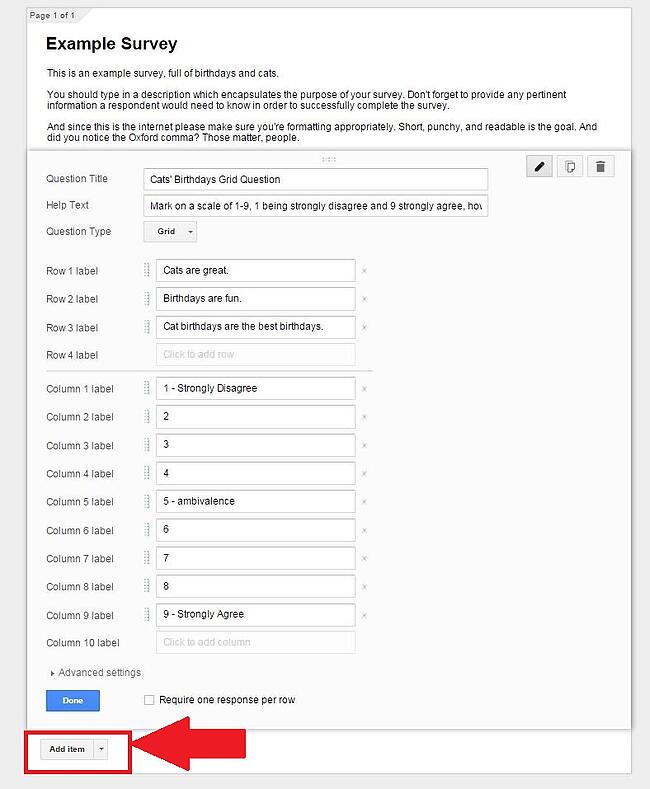
This will add another question, once again defaulting to “Multiple choice”.
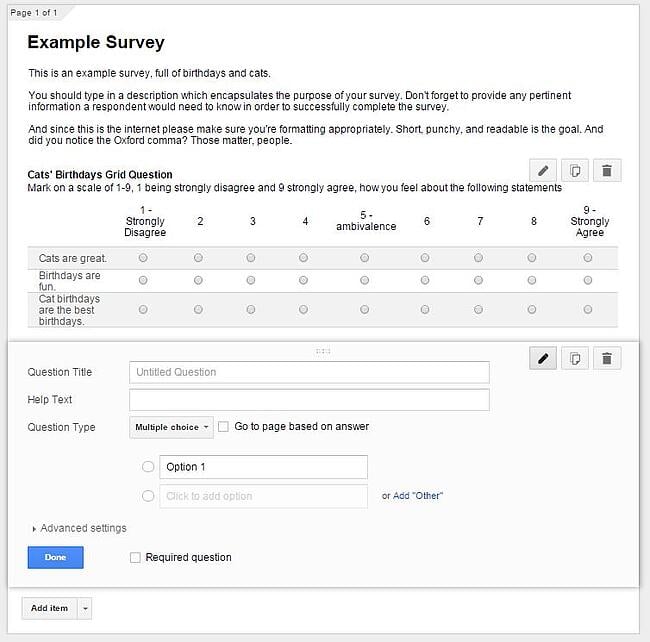
Let’s toss in and fill out a few more questions in to make this a complete survey.
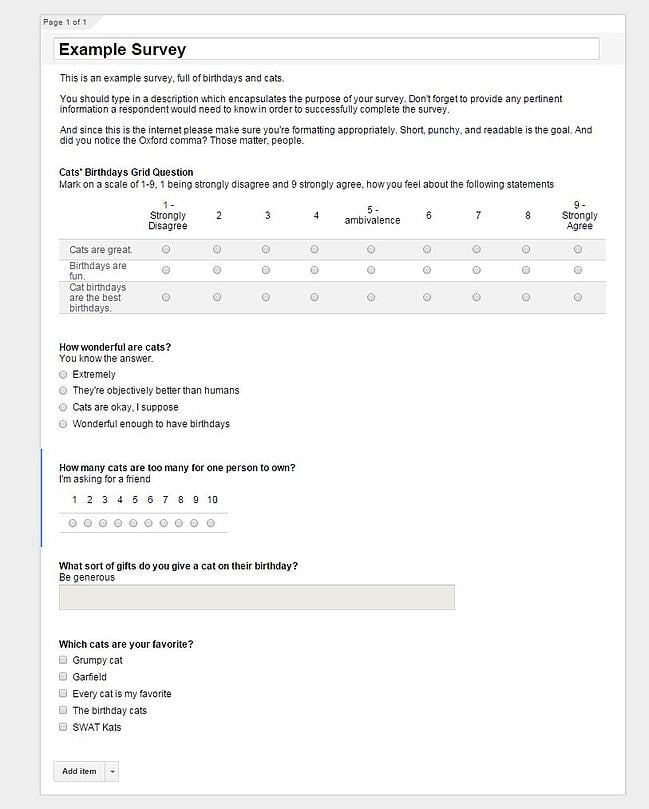
And let’s preview it again to be sure we’re happy with the format, design, and layout:
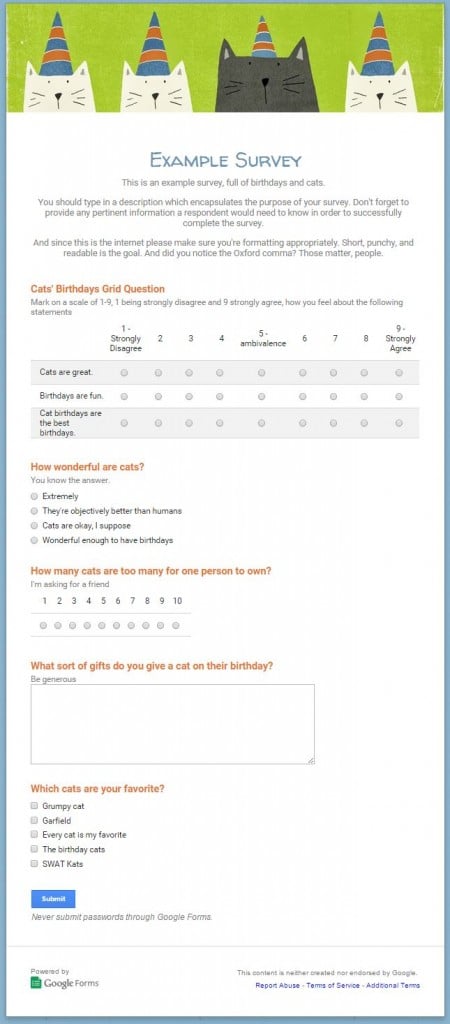
Looking good, looking good.
Let’s take a peek at advanced options.
Step Nine: Advanced Options
Advanced options are contained at the top and bottom of your survey Form page.
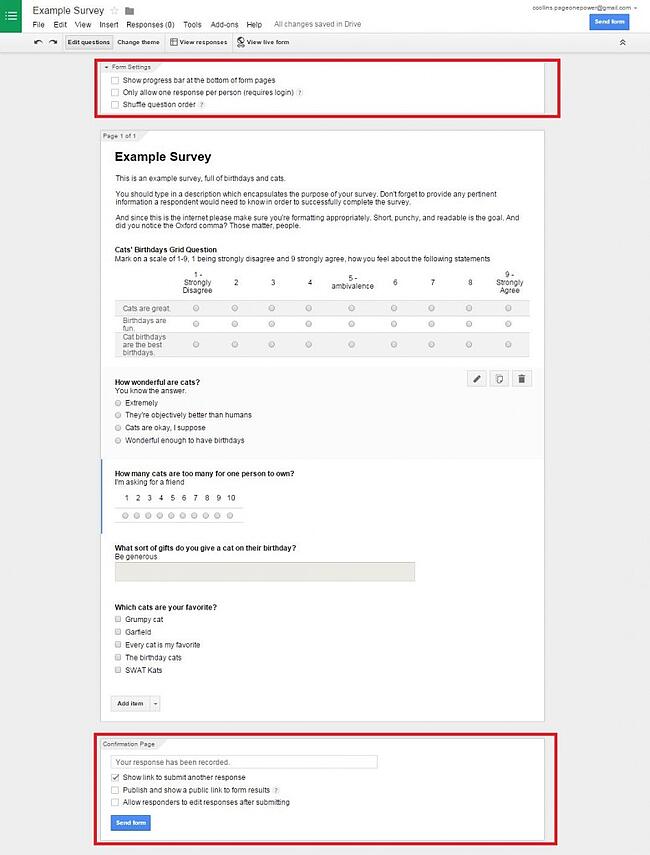
There are two subsections: Form Settings and Confirmation Page
Form Settings includes:
- Show progress bar at the bottom of form pages – will display a progress bar at the bottom for respondents. Great for survey fatigue.
- Only allow one response per person (requires login) – again, self-explanatory. Requires the person to sign in with their Google account in order to begin the survey and will only allow a single submission.
- Shuffle question order – simply shuffles the order in which the respondent sees the questions.
For the confirmation page, there are four more additional advanced options:
- Text bar – shows the text the respondent will see upon completing the survey.
- Show link to submit another response – Allows the respondent to click the link to immediately fill out the survey again. Can’t be used with “only allow one response per person”.
- Allow responders to edit responses after submitting – respondents who are signed in have the opportunity to go back and edit their responses.
Step Ten: Sharing Out the Survey
Alright, we’ve built a survey, for free, using Google Docs. We’re happy with the questions we’ve created, we love our birthday cats theme, and the only thing left to do now is share it out to our survey group.
First, make sure the survey is live and accepting responses.
Click “Responses” under the top menu:
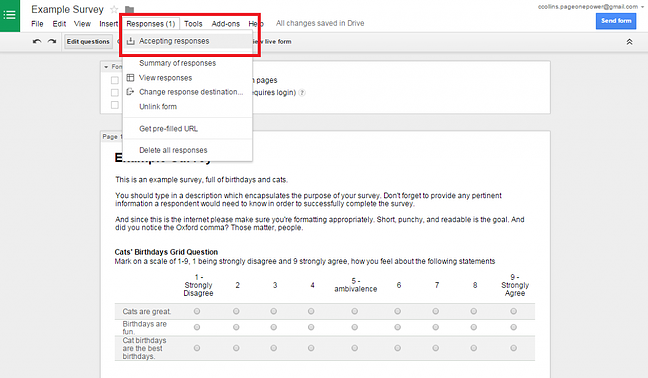
You’ll want to be sure the option reads “Accepting responses”.
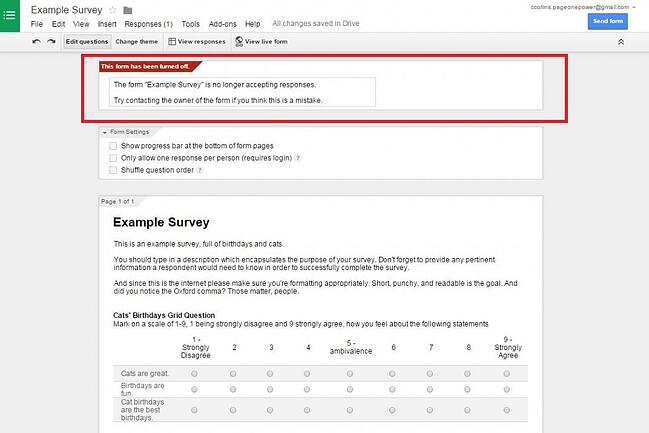
Otherwise, it will read “Not accepting responses” and there will be a red highlighted box at the top of your form to indicate the survey is no longer live:
Once you’re sure your survey is live and ready to be shared, you have two options to share the survey with your group.
- Simply share the link of the live survey to your group.
- Click File > Send Form > and enter emails
Let’s walk through both options.
To share the link, you’ll first have to go get the link from the live form. Once again click the “View live form” button in the top menu:

This will take you to the URL of your survey page:
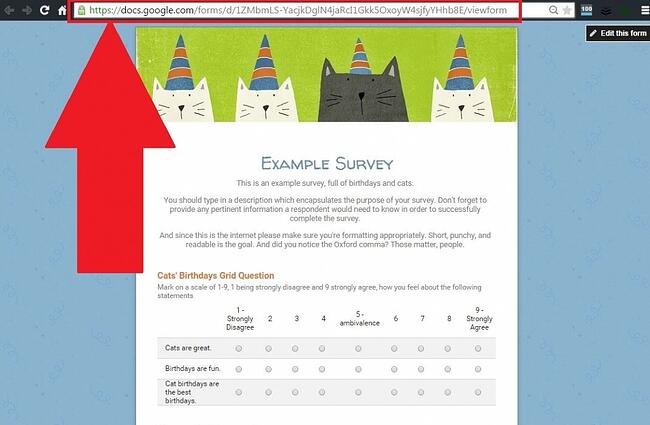
For our example survey, the URL is: https://docs.google.com/forms/d/1ZMbmLS-YacjkDglN4jaRcI1Gkk5OxoyW4sjfyYHhb8E/viewform
Simply save this URL and share it out with whomever you’d like to complete your survey. Anyone with that URL can navigate to the page and fill out your survey.
Alternatively, you can somewhat automate this process by click File > Send Form:
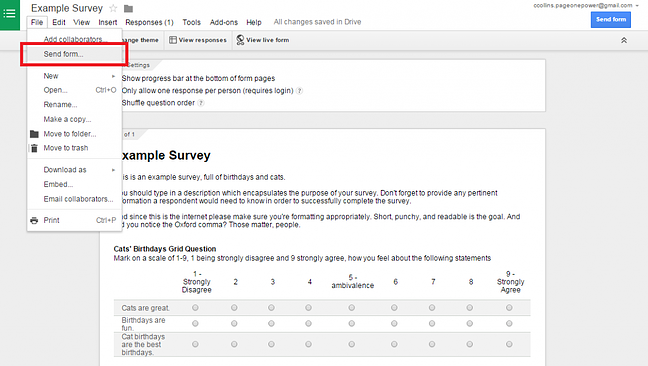
This will pop up the “Send form” box:
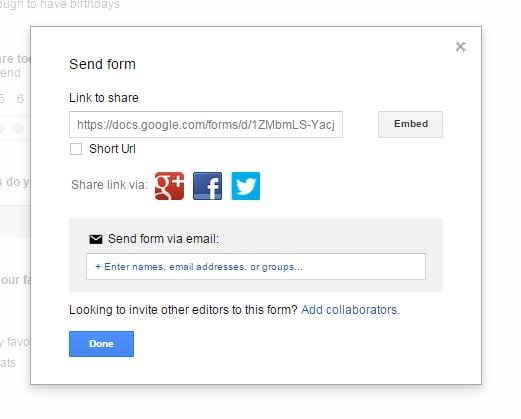
Simply add names to the gray “Send form via email” box and you’ll instantly email everyone a link to the survey. Your Gmail contacts will also be accessible through this, making it easy and simple to send the survey to anyone within your contact list.
And that’s a wrap!
That’s all there is to it – we’ve built a simple, free, shareable survey which will instantly dump responses into a Google Sheet for us to view. Hope you enjoy and let me know if there are any questions!


